September 2016: Fall Decorating Tips September 15 2016
As the crisp warm leaves fall from the trees and the kids begin to grow with excitement you start to feel the crisp autumn air set in. Bring the fresh, fun, autumn atmosphere in to your home with the following tips!

1. Dress up your front porch with corn stalks or straw to wrap around anything. Using thick colored ribbon in deep oranges to tie everything together. Carry these same materials into lanyards or garlands around your front door and entry.

2. Use your fireplace to showcase seasonal décor: Your fireplace mantel has been waiting for this season! Whether you look in your yard, or you travel to an arts and crafts store, dried leaves and pinecones make great décor. Small pumpkins, gourds or dried leaf vines, and colorful candles will brighten your mantle and spirits.

3. Include Autumnal Colors Combine autumn red or orange splashes with a neutral or contrasting base such as taupe, olive, or blue. Muted greens are fresh alternatives to bold warm colors. Throw Pillows, table accessories, and accent rugs are high-impact, low-investment places to start.

4. Find woodsy elements at your local farmers' market or your own backyard. Look for moss, grasses, and small branches. Fill interesting pots with any combination of them, or turn a bundle of twigs into a natural photo holder.

5. Depending on if you want to go formal or casual for your table, choose colors that reflect your home decor AND the season. Using red and yellow apples for an informal organic and edible centerpiece is pleasing to the eye. For more formal centerpiece design try adding a tablecloth that has hints of fall colors and themes. Small but unexpected details go a long way at the dinner table.

6. Fall decor can be visual but it also involves your other senses like smell. Pumpkin pies, cinnamon apple cider and fire wood scents are all warm and cozy smells. Try using candles, incensing, or boiling a pot of spices.
Tips for Decorating with Personal Souvenirs August 15 2016
Shadow Box - Piece together a shadow box with mementos you scored on your trip. Cut letters of the city out of postcards or photos and added in little touches like sand from the area. Add other small little trinkets that add to the design and feel of your trip
 Bottles of Sand - Collect sand from your travels and create a display of them contained in bottles and jars of different shapes and sizes to add a shabby chic touch. Label them with the names of the places you took them from, and you'll have a display that's guaranteed to transport you to a different city. Or grab one big jar for your local store and put the sand in drawing a line at the top of each layer with where the sand is from.

Frame Up Paper Mementos - Take all the paper mementos you collected on your trip — be it photos, tickets, brochures, wrappers, maps, menus, currency, and more — and place them in a frame to create these collages. Play with the idea of using one large frame or using multiple smaller frames to create a large feature gallery wall.

Cubby Organizer - You can always organize your souvenirs in a cute cubby organizer. Try picking up some vintage printers trays to store your knickknack souvenirs in.

Memory Box - Use wooden boxes and stencil in the names of the cities, then paint them in different colors that would display well in your bookcase. This is great if you want to you’re your souvenirs on hand and (somewhat) on display but not having to put a lot of work into the actual display. Not only are these boxes pretty, but they'll also keep your souvenirs organized, which means you'll be able to relive a particular trip's memories with ease when you take out a box to explore its contents.

Source:
http://www.popsugar.com/smart-living/How-Display-Travel-Souvenirs-30410433#photo-30411110
http://hellolittlehome.com/decorating-with-travel-souvenirs/
August 2016: Tropical Interior Designs August 15 2016
With winter just around the corner here are some good examples of tropical interior designs and key elements within each design to keep you thinking of summer.
Textural weaves

Tropical woods with an exotic flavor

Sheer, floaty window treatments

Plenty of plants

Luxurious like a tropical resort vacation home

Accents from the beach

Blur the line between indoors and outdoors

Source:
homeportfolio.com
myinteriordesign.com
Nautical Interior Design Inspiration July 15 2016

If there’s one style that never goes out of style, it’s the nautical, beach-inspired look. This style will function well in any area of your home, the bathroom, your kitchen, or even your kids room. The characteristic features of nautical interior design are the presence of textile, inexpensive wooden furniture and an abundance of white color. Nautical interior design is the perfect way to make us feel like the ocean is always near. With elements such as ships, anchors, sea creatures, and the nautical colors of navy and white, you can relax in the comfort of your own home. Below are a few elements you will find in any of these spaces.

1. White Walls – Use white walls to give your space a blank slate and to create a open and fresh feeling in the rooms.
2. Light floors - There are many ways you can go about doing this, if you are willing to splurge on some new flooring simply pick a whitewashed wood panel, or go for a fun soft cream carpet. If new flooring simply isn't an option start with painting your old floors with the proper kind of floor paint. In this kind of space, the more damaged and scraped up your floors are, the better.
3. Wood paneling - Whether it be in a bathroom or bedrooms on walls or on ceilings, wood paneling creates visual interest in a white on white color schemed room. The shadows in the joints of the paneling create texture and warmth. Play with the idea of using this to cover your ceiling surface as well. This could help make a room feel longer or wider depending on which direction the panels go and I actually think it might make the room feel taller too.
4. Beams – faux wood beams are fairly easy to make or find and they also are a quick and simple way to hide any loose wires or ventilation on your ceiling. It also helps with the feeling of getting away, like you have escaped to a cottage after all.
5. Striped Textiles – An introduction of striped patterns in furniture, area rugs, linens, drapes etc. create a more relaxing feel with the repetitive and calming aspects of the pattern.
6. Blue! (and grey too) – A MUST! Dark blue with a light grey are great colors to introduce to your space without screaming your nautical theme and they also complement the white surrounding the space, counterbalancing all of the bright white.
Sources:
http://www.2015interiordesign.com/wp-content/uploads/2014/02/nautical-interior-grid.jpg
http://samuelandpandora.com/wp-content/uploads/2011/08/Nautical1.jpg
http://samuelandpandora.com/nautical-inspired-white-interiors/
http://i.dailymail.co.uk/i/pix/2009/05/21/article-1186074-04D836AA000005DC-26_634x462.jpg
http://www.stylemotivation.com/19-fantastic-nautical-interior-design-ideas-home/
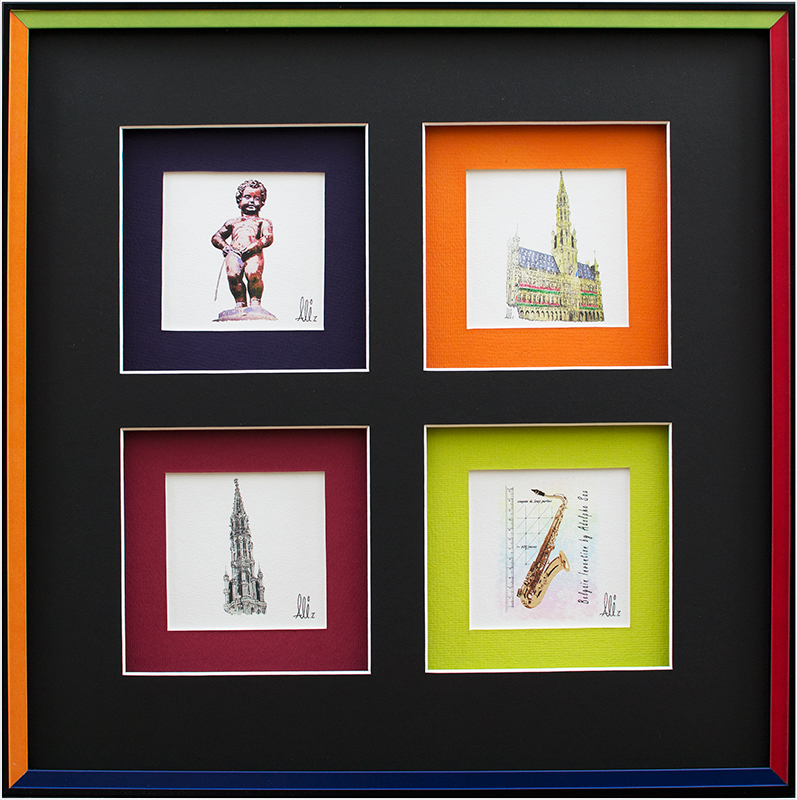
Tips for Using Colored Mat Boards May 15 2016
When choosing the mat you use inside your framed artwork there is more to consider then what you may think, it is also more important than you might think. There are two reasons for matting art: It keeps the glass separated from your artwork so it won’t stick to the glass, and it enhances your artwork. And a mat gives needed space so your eye can hone in on the art and it does not get cut off in the frame, especially when you use chunky frames.  Here are some more tips:
1. Choose your mat color based on what will best compliment the artwork — not the space you are hanging it.

2. Seek balance between the art and the framing that surrounds it. Avoid using the dominant colors in the art as the dominant colors in the framing. Instead, identify secondary colors in the art that share the prevailing value and temperature of the art as a whole.


Sources
http://www.houzz.com/ideabooks/653859/list/the-right-mat-for-your-artwork
http://phoenixartsupplies.com/custom-picture-framing/images/multi-colored-picture-frame.jpg
http://ecx.images-amazon.com/images/I/41YxDXSRo%2BL._AC_UL320_SR262,320_.jpg
https://s-media-cache-ak0.pinimg.com/236x/dd/eb/7f/ddeb7f631d379bd940ea2408f8cb3643.jpg
Spring Cleaning Tips and Tricks April 15 2016
 It’s that time again! It’s easy to put off or dread spring-cleaning because it feels like you’re unearthing a year’s worth of grime and clutter, but take it one day at a time, and don’t be afraid to take a whole week to clean! A whole house is WAY too much to take on in one day! Use these helpful tips and tricks to take your cleaning one step at a time!

Lastly don’t let all that cleaning go to waste! Make sure youre getting rid of old junk that you don’t need anymore! Take a look at the list below to help you get started!
- Old magazines - chances are, you wont read them again. Find places where you can donate your magazines to. If there's an article that really speaks to you, scan a digital image or keep a folder of magazine clippings if you like saving magazine articles.
- Receipts, bills, and documents - Throw away receipts for items that you aren't planning on returning, and ones that you won't need to use come tax time. If you're wary of throwing away receipts, you can make a digital copy.
- Clothes - Use the two-year-rule for clothes — get rid of apparel that you haven't worn in two years.
- Books - Go through your bookshelf and gather together books you haven't touched in months and ones that you aren't planning on rereading. Be realistic and make sure you're ruthless.
- Medicine and vitamins - Take a look at your medicine closet and clear out drugs that have expired, medicine that has sat on your shelf for too long, or ones that you no longer use.
- Makeup and perfume - Go through your beauty cabinet and get rid of makeup that's too old or that you don't use.
- Jewelry - Go through your jewelry and dispose of the broken costume jewelry and make plans to sell ones that you don't wear.
- Some memorabilia - Many organizing experts advise to be ruthless and throw away memorabilia like cards and gifts you don't use. But designating a small shoebox for memorabilia is much easier and only throw away anything that can't fit into the box.
- Old or unused electronics - Sell your old electronics to different online relators and toss out the old ones you don’t use anymore. With the growing age of technology if you haven’t used something in 6 months you probably wont use it again.
Sources:
http://www.cleanmama.net/2015/03/gather-your-tools-the-best-tools-for-spring-cleaning.html
http://www.popsugar.com/smart-living/Things-Throw-Away-21653157
Decorating a Tricky Corner Space March 18 2016
Everyone's home has those pesky nooks and crannies that are hard to decorate. Often times awkward spaces are just left hanging about distracting the flow from the rest of the room. Here are some tips to make use of those floundering spaces.

- Place some plants there: buying some cute pots and planting some greenery to a corner will help to fill it up and add an interesting nature element to your space.
- Angle your TV: Angling your TV to block a corner will help unify the space by eliminating the corner and instead making the TV the focal point of the room.
- Create a reading nook: Add a cozy chair and small table to create a little corner perfect to curl up to with a book and a cup of coffee.
- Find a corner cabinet or table: This is the perfect solution to a confusing corner. These tables are perfectly angled for a corner that doesn't quite fit with the rest of a room.
- Lean a mirror or reclaimed signage against the corner: This will add a unique flair to the room and can really compliment other design elements as well.
- Freestanding shelves or a display cabinet: Shelves always work well in a corner and they are a great way to store extra containers or items in an alluring way.
- Corner play area: If you have children you can set up a fun play area in the space and make it feel like it is their own little world dedicated to all their toys and fun.
- A tall or over sized lamp: A lamp can be both charming and beneficial to a room by adding a design element and extra light.
- Wall art: Perfect for any lingering corner you can hang a series of photos or art pieces that you enjoy that will bring positive attention to a corner that you would usually ignore.

April 2016: Decorating with Pantone Color of the Year March 15 2016
It’s twins! For the first year ever Pantone named not one, but TWO colors of the year for 2016. The shades were chosen to convey a rosy warmth and tranquility for the new year, also playing a nod to societal movements toward gender equality and fluidity,” as the company said in a statement. The “baby” blue and pink colors may remind you of the walls of a nursery but Pantone says that the open exchange of information online “has opened our eyes to different approaches to color usage.” And that “Rose quartz is not baby pink,” says Leatrice Eiseman who, as executive director of Pantone’s Color Institute, oversees the company’s annual choice of Color of the Year, agrees that “It doesn’t have that wimpy feel.”


 Explore the balance between the masculine and feminine sides of both the colors. Using the furniture and design of your room to counter balance out the color. Also play with the idea of adding a complementary color that gives more of a balance to the room.


Sources:
http://www.realsimple.com/home-organizing/decorating/pantone-color-of-the-year-2016
http://www.architecturaldigest.com/story/pantone-color-of-the-year-2016-decorating-ideas
http://www.wsj.com/articles/its-a-pink-and-a-blue-1449083326
DIY tips for Hanging Art: Wall Types March 09 2016
Picture Hanging Hooks:
-
Use picture hanging hooks instead of nails. Although nails may seem sturdier because they are heavier, the hooks go in the wall at an angle and are much more secure for picture hanging.
-
Picture hangers are specifically made for hollow walls making it easier on any surface that is too weak to hold a nail or a screw.
-
Buy the right type of hook for your arts weight.
-
One-nail picture hook: holds 30 pounds or lighter
-
Two-nail picture hook: holds around 50 pounds
-
Three-nail picture hook: holds between 75 - 100 pounds
-
Use two hooks per artwork to provide security and help the art remain level.
Type of Wall:
Plaster & Drywall:
- When dealing with drywall or plaster it is best to have a stud finder. This will help you find the wall studs in your wall and allow you to hang the artwork from the most secure spots to avoid wall damage. Wall studs are the wooden framings behind your wall; knowing where they are will stop you from hanging art in an unsteady section of your wall. You can buy electronic stud finders that beep or flash when identifying a spot containing wall studs. Prices range from $20 to $40 and can be found in most hardware stores.
- When hanging on plaster wall use a piece of scotch tape where you will hammer in the hook to prevent the plaster from crumbling.
Wood & Paneling:
- When dealing with wood or panel use wood screws. Wood screws are easy to install with a screw driver and stay in wood/paneling very strongly.
- If you are hanging something lightweight use adhesive strips and hooks to avoid any wall damage. Part is attached to the wall and the other part is attached to the picture. Line these two parts up and simply press the picture in place. If you want to take down the picture just pull the adhesive strips off the wall. Be careful though, for these strips hold a maximum weight of only eight pounds.
- When dealing with a heavier art piece use anchors that spread out behind the wall after inserting the screw.
- Installing nail or screw holes into the grooves of paneling make it harder to see them when they are removed.
Photo Gallery Ideas February 10 2016

What better way to decorate your walls with photos of memories with loved family and friends? Galleries like these really help turn a house into a home. One of the most common ways to display collections of photos and pictures is a home wall photo gallery. Here are some tricks to transform your gallery into a stunning masterpiece that will last for years to come:
- Find a large quantity of match frames (or paint some frames so that they match), print your photos in black & white, then hang the framed photos in a grid.
- Print your family photos on canvas for an extra special touch. Canvases don’t even need frames–hang the pictures as is! Perhaps print several pictures on different sizes of canvas and then hang them in a cluster.
- A unique touch is keeping all of the photos black and white, but the changing the frame styles. Hanging the photos with twine is a nice touch, and the layering gives your gallery an extra oomph.
- You can format your pictures into a grid before printing. Then you could either print on large photo paper and frame it, or you could print on canvas. Beautiful!
- This idea is super fun: All you need to do is string some twine across a wall and then hang your favorite pictures using clothespins. I love the vintage feel of this idea.
- Making a beautiful gallery wall is a perfect idea to spice up a hallway and add color. Using color photos will really help your collage stand out against a black framed background.
