DIY tips for Hanging Art: Wall Types March 09 2016
Picture Hanging Hooks:
-
Use picture hanging hooks instead of nails. Although nails may seem sturdier because they are heavier, the hooks go in the wall at an angle and are much more secure for picture hanging.
-
Picture hangers are specifically made for hollow walls making it easier on any surface that is too weak to hold a nail or a screw.
-
Buy the right type of hook for your arts weight.
-
One-nail picture hook: holds 30 pounds or lighter
-
Two-nail picture hook: holds around 50 pounds
-
Three-nail picture hook: holds between 75 - 100 pounds
-
Use two hooks per artwork to provide security and help the art remain level.
Type of Wall:
Plaster & Drywall:
- When dealing with drywall or plaster it is best to have a stud finder. This will help you find the wall studs in your wall and allow you to hang the artwork from the most secure spots to avoid wall damage. Wall studs are the wooden framings behind your wall; knowing where they are will stop you from hanging art in an unsteady section of your wall. You can buy electronic stud finders that beep or flash when identifying a spot containing wall studs. Prices range from $20 to $40 and can be found in most hardware stores.
- When hanging on plaster wall use a piece of scotch tape where you will hammer in the hook to prevent the plaster from crumbling.
Wood & Paneling:
- When dealing with wood or panel use wood screws. Wood screws are easy to install with a screw driver and stay in wood/paneling very strongly.
- If you are hanging something lightweight use adhesive strips and hooks to avoid any wall damage. Part is attached to the wall and the other part is attached to the picture. Line these two parts up and simply press the picture in place. If you want to take down the picture just pull the adhesive strips off the wall. Be careful though, for these strips hold a maximum weight of only eight pounds.
- When dealing with a heavier art piece use anchors that spread out behind the wall after inserting the screw.
- Installing nail or screw holes into the grooves of paneling make it harder to see them when they are removed.
Photo Gallery Ideas February 10 2016

What better way to decorate your walls with photos of memories with loved family and friends? Galleries like these really help turn a house into a home. One of the most common ways to display collections of photos and pictures is a home wall photo gallery. Here are some tricks to transform your gallery into a stunning masterpiece that will last for years to come:
- Find a large quantity of match frames (or paint some frames so that they match), print your photos in black & white, then hang the framed photos in a grid.
- Print your family photos on canvas for an extra special touch. Canvases don’t even need frames–hang the pictures as is! Perhaps print several pictures on different sizes of canvas and then hang them in a cluster.
- A unique touch is keeping all of the photos black and white, but the changing the frame styles. Hanging the photos with twine is a nice touch, and the layering gives your gallery an extra oomph.
- You can format your pictures into a grid before printing. Then you could either print on large photo paper and frame it, or you could print on canvas. Beautiful!
- This idea is super fun: All you need to do is string some twine across a wall and then hang your favorite pictures using clothespins. I love the vintage feel of this idea.
- Making a beautiful gallery wall is a perfect idea to spice up a hallway and add color. Using color photos will really help your collage stand out against a black framed background.

How to Decorate Tall Walls November 24 2015

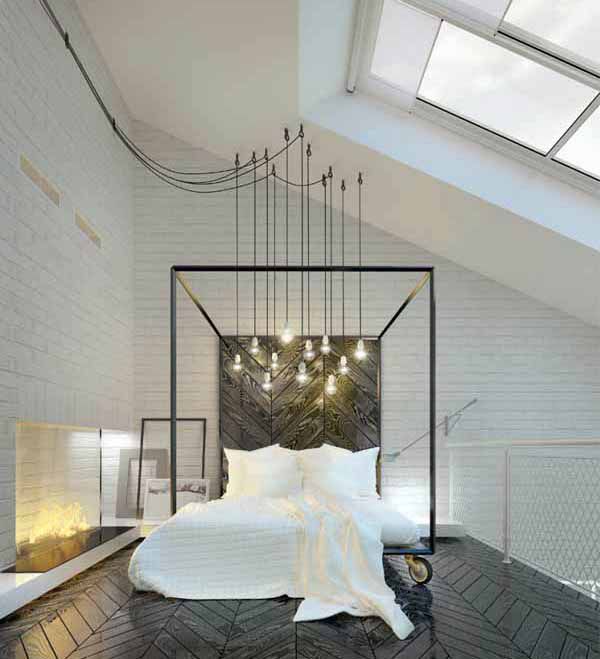
Whether they are in a foyer, your family room, or even a bedroom, the soaring ceiling that come with tall walls look fantastic and create such an open, airy feeling to your home, but when it comes to decorating the adjacent walls, most people are left scratching their heads. Thankfully, we found some tips on what to and not to do when decorating those walls that go on forever.

- Use large scale art -- Gallery walls and oversized art are probably the most common solution to fill up those tall walls. A large grouping of art or photographs are a great way to fill up the space.
- Add trim -- Adding trim to your wall is also a great way to break-up the vastness of those soaring, double height walls often found in Foyers and great rooms.
- Use color and texture -- Here, panels of trim are filled with grasscloth. Printed wallpaper would also look great and create the feel of an art piece.
- Hang a mirror -- Mirrors are a great alternative to hanging art. Try a large oversized mirror, or a grouping of smaller mirrors.
- Install shelving -- If you are a book lover, consider adding some custom library shelves and make that open space functional.
- Distract -- And lastly, a great way to sole the big empty wall syndrome is to distract the eye AWAY from the wall by adding dramatic floor to ceiling curtains, or an oversized light fixture.
Source: Sarah Langtry, Bloglovin',
How to Design a Photo Gallery Wall November 24 2015

Wall galleries look simple, but they are not an easy task. We found an article that breaks the process up into steps that will result in a beautiful, slightly offbeat but still balanced wall full of photos and prints that mean the most to you.
-
Selecting photos and frames -- Choose a theme and/or a common color palette as a guiding force in your selection process. Remember that displaying simpler images in large scale and more detailed/complex images in small scale results in a more pleasing, less cluttered layout.
-
Designing the layout -- Remember that achieving the asymmetrical-but-balanced look is easier said than done, and it will take a lot of patience.
-
Defining the dimensions -- Start by placing tape on the wall to define the outer boundaries of the photo area so that you can design an arrangement that works well within the available dimensions of the wall.
-
Arranging and re-arranging -- Place all of your framed photos on the floor in the same relative dimensions as the outer boundaries and then experiment (over and over again) with different layouts. It is even okay to eliminate a couple of photos and add some new ones. Give yourself time to get used to the layout before attaching it on the wall to make sure that you really like it.
-
Documenting the layout -- Once you have an arrangement that you are set on, document the overall layout by taking a panoramic photo on your phone (which is easy to do with the iPhone camera app.) Take detailed shots of smaller sets of groupings. The panoramic image allows you to remember the layout of the photos, while the details hots allow you to see the specific alignment of the one image to its neighboring image. To maintain a sense of order, pay close attention to the alignment of the frames and the spacing between them. Different sized frames cannot be consistently aligned or have consistent spacing throughout the overall layout, so work in small groupings and make mini arrangements of consistent alignment and spacing. Remember to have fun with it!
-
Installing on the wall -- When you are ready to transition the photos to the wall, start in the center of the collage, where the largest images are, and work your way out from there. Use the detail photos on your phone to ensure that the alignment of the frames and the general spacing between them are matched up. 3M picture hanging strips are useful for most of the installing process, except for particularly large frames. These will help you hold a picture in the approximate position while using a tape measure to ensure the correct distance from the neighboring frame to make sure it is straight. Press the frame to the wall when it is ready.
-
Remember that this is not the easiest nor the fastest process, but it is something that you will be sure to enjoy for many years to come. Put in a little patience with your work, and it will be worth it.


Source: Julee, warmhotchocolate.com.
Decorate Your Rental Space November 24 2015

- If your landlord allows you to install shelves (or if they’re already installed), that’s a good way to display pictures, artwork, and other items. This does require making a few holes in the wall, but not nearly as many as if you mounted each piece individually. Shelving also allows you to rotate displays.
- You’re probably not allowed to paint the walls, but no one’s stopping you from painting your furniture! A new coat of paint on a table, dresser, or bed can bring the pop of color you’ve been craving.
- Ugly carpet or damaged wood/linoleum can be covered with a tasteful rug. Adds color and style to an otherwise dull apartment.
- Make use of bookcases because they are great for storing a variety of items and require no hole-making installation. You can even make a coat hanger out of a tall bookshelf by taking out the top shelves and installing hooks. Pictures and artwork can also be displayed on bookshelves, as well as dressers, desks, and armoires.
- Add curtains and valances to the windows using spring-rods that don’t have to be screwed in.
- Easels are another good way to display pictures without damaging the walls.
- Hanging tools that don’t cause as much damage as nails: 3M hanging products, putty, tacks, tape, Velcro
Find the full article and more photos at http://howtobuildit.org/2013/10/09/tips-for-decorate-rental-spaces/2/.
9 Tips for Hanging Wall Art Above a Sofa November 13 2015

There are multiple factors that affect how exactly to hang a piece of artwork above a sofa, such as the size of the sofa or the art itself. The height of the ceiling, the space available and even personal preference also all have an impact on how it looks. Following tips will help you to create the balanced look that you wish to achieve in order to make your interior decoration flow well and be visually stunning
- Have twice as much space above the art as below it.
- There should be at few inches from top the of the couch to the bottom of the artwork.
- Raising artwork to high above a piece of furniture can make the gap too obvious and seem awkward.
- Make sure there is a sense of unity between the art and the couch so that it does not look like it is floating alone on the wall.
- Pay attention to scale to create an overall cohesive look.
- Wall art that is two thirds the length of a couch is most visually pleasing to the eye.
- Typically wall art that is anywhere between 50% - 90% the length of the couch looks best. The perfect medium is an even 75%.
- Try not to hang artwork that is longer than the length of a couch because this creates an unbalanced look causing an unappealing top heavy appearance.
- Whether you are hanging one large piece or several small pieces paying attention to scale is important in achieving the most aesthetically pleasurable look.
Following these basic measurements will create a unified slick look for your room. Be sure to only change any measurement to better compliment your specific room dimensions.
5 Tips for Hanging Vertical and Horizontal Frames Together August 31 2015

Often times when hanging multiple pictures that are both vertical and horizontal you can end up with awkward positioning and strange gaps left between. But if you choose to follow these rules you will not have to face the confusion of deciding which combinations look best.
- Larger pictures should go on top above smaller images. This creates a smooth equal weight look.
- Always align horizontally from the top and vertically from the middle. This makes a cross balance that creates an equal look and the aligned rows create a visually calming vibe.
- Create an imaginary perimeter where you want your group of photos to be and hang them so the outer edges touch upon the established perimeter. Plan out the matting and framing before you set your perimeter so you can properly lay out the format you plan on using.
- For a more eccentric look you can imagine a oval or loose circle as your perimeter. This works well if you are trying to cover a wide space.
- Group out the photos on the ground before you hang them to make sure you choose the right format for you.
- Our photo is an example of balancing two horizontals by placing the vertical in the center. Keeping the grouping together in a balance.
Picking out a Mat August 24 2015

Types of Mat
The purpose of adding mat to your prints is to protect and preserve it from damages as well as adding style. The mat separates the artwork from the glass to prevent it from sticking and fading out. There are many different routes you can go while choosing a mat for your prints such as the type, the style, the size and more.
The Types
Paper - This mat is made of paper pulp and it the cheapest mat to get. Often times when you buy a frame this is the mat that is already in it. This type can easily turn brown and the pure white will fade away. To prevent this from happening you can go to a framing store and ask them to switch out the paper mat for a different more durable type.
Alpha Cellulose - Made of wood pulp to prevent decaying.
Rag - Made from cotton. The most effective choice for keeping artwork safe because there is no acid in it and it keeps the edges white forever. It is also the most popular among museums and professionals.Sizing:
- Basic sizing is two to three inches of mat. But don’t be afraid to go bigger, if your piece is larger than 11” x 14” try a bigger mat to properly scale it. The mat is supposed to draw the eye toward the piece and based on coloring even toward a specific element in the piece.
- If your matting photographs go with a wider mat to create a contemporary yet polished look.
- When done right, pairing an oversized mat with a small picture can attract the eyes towards the picture and create a strong presence for the art piece.
Color:
- Pick the color based on what best compliments the art work.
- Stick to neutral tones in the gray/taupe scale. Try to stay away from colors that are either brighter or darker than the image you are framing.
- If you do want to add in color, layering mats is a great way to do so. Using a bolder color on the first thin layer will allow the picture to pop without overwhelming the art .
Helpful Hints: Online Framing August 17 2015
Sometimes the hustle and bustle of getting your pictures framed can be a lot of hard work. With online framing you can skip all that and do everything yourself. Its as easy as placing an order and voila, your art and frame will come to you. Online framing is a way to make your framing experience easier, more convenient and less expensive than visiting a shop. You can even take pictures off your social media accounts and turn them into beautiful high quality framed art for you and your family and friends to enjoy.
The whole process is simple and painless. All you have to do is pick out a piece of art that you want framed; it can be a picture you purchased, a photo you took or artwork that you made yourself, whatever it is that you want framed and on display. Then you visit whatever online framing store you have chosen to work with and pick what size, style and mat you would like. After you have picked your photo and framing style you send it to the online shop of your choice. From there all you have to do is wait for your custom frame to be returned to you. The shop makes the personal frame that you ordered and sends it back when they are done. Easy as that. No wonder online framing is gaining popularity to quickly.
DIY: Patching up a Hole in the Wall April 02 2015

Everyone who has used a hammer and nail on their drywall knows the pesky holes that it leaves behind. By following these rules you can cover up those annoying left behind holes and your wall will look good as new.
What You Will Need:
-
Wall patch - A wall patch is an adhesive patch that sticks to your wall to nicely cover up the hole you are trying to fix. You can purchase a wall patch at any hardware store and they are usually between $2 - $7 depending on the size or kind.
-
Joint compound or spackle - This is what you use to cover the wall patch. Joint compound is white and similar to plaster. Spackle is a putty substance used mostly for smaller projects.
-
Putty knife - This is what you will use to evenly spread the compound or spackle. A putty knife can range in price from $5 - $30 based on its size. You can pick which putty knife size is best based on the scale of your project.
-
Sanding block - You will use this in one of the last steps to sand the surface and make it smooth.
-
Paint - Last but not least it the paint to officially cover up and blend with the rest of the wall.
The Process:
- First you want to smooth the surface that you are planning on fixing to remove any chunks of drywall from the hole. Once you have done this clean and dry the surrounding area
- Next use a wall patch over the hole. Wall patches are great for easily covering up holes left behind in drywall. You can purchase one from any hardware store for anywhere from $2 - $7. Make sure to smooth the patch evenly to the wall.
- Once you have the wall patch over the wall you should apply a thin layer of joint compound or spackle to the hole and evenly spread it with you putty knife.
- After the area has dried sand it until it is sufficiently smooth and apply another layer of compound or spackle. You can repeat this process however many times until the area is properly to your liking.
- After the final coat of compound or Spackle has dried, sand the surface one more time and finally wipe it clean. You are now ready for the final step!
- Lastly, paint over the surface and voila your wall is fixed.